Timz MESH Info Page
Below were my Mesh Tower Cam goals... yours may vary:
* Outdoor rated - IP65 or better
* two axis movement (pan & tilt), with zoom
* Optical Zoom (instead of digital zoom)
* Comforms to the PTZ command standard
* meets the H.264 video standard
* View with browser (no special viewing program required)
Here is what I purchased from Amazon.com:
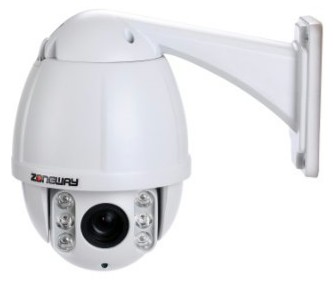
Zoneway 10x Optical Zoom Outdoor, 1.3mp 960p Dome PTZ Camera (IR Night Vision)
Note, there are quite a few cameras on Amazon that are similar... but not all are this exact model. These "near-models" may work just as good; though this web page covers just this one specific model. The difference between this camera - and the "near models" - is in the area of the infared illuminators... and how they are mounted (inset/recessed) into the rotating gimbal , on each side of the lens. When trying to determine if a camera is this exact same model or not, look there.
Only one setting need be altered from the factory defaults in order to have the camera work on mesh, and that is to switch it's network usage from a static IP - to an assignable IP arrangement (DHCP).
I am certain there is more than one method to accomplish this task, but this is the one I used:
From fresh out of the box, plug the power into the cameras pigtail. The camera performs two different gimbal tests, the first one happens about 15 seconds after first power... and points the camera lens straight down. About one minute or two after that, the gimbal will move again and stop when pointing straight level. At this point the camera is ready to use.
* Connect an ethernet cable from the camera to your homes router (not to your Mesh node). Open a browser window (I used InternetExplorer) and type in:
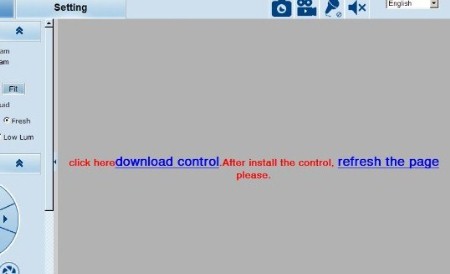
192.168.1.110 (this may be different if the camera model is not exactly the same as the one I have). After entering "admin" for both log-in fields... you should see the Viewer/Control Screen on your computer. If you have live video showing on the screen, skip to the next step. If you don't have live video on the screen, and instead have this gray box showing:you need to download the driver from the camera. Click on download control, and when prompted... click on run/install
After the driver downloads and installs. Close the browser window completely, and then restart it again, going to the 192.168.1.110 address again. You should now have live video instead of the dark gray box.IF YOU ARE UNABLE TO ACCESS your camera from your homes router.... click here.
* Click on "Setting" - just above the left corner of the video part of the screen, and then on the "Network" tab
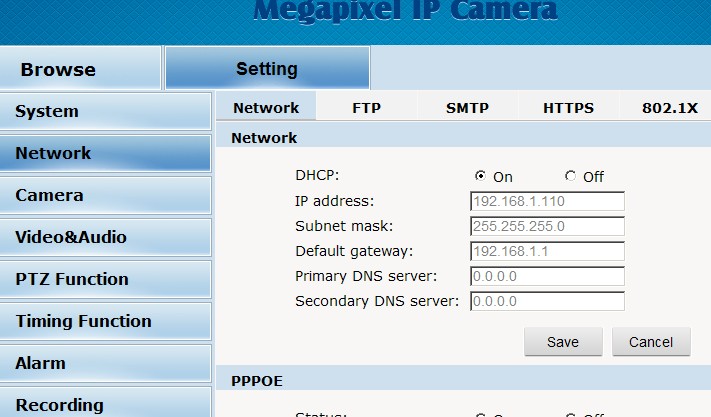
from the factory, the DHCP function is turned off. Click "on" and then below that "Save". I don't remember exactly, but it seems to have taken a minute for the Save function to complete. I also don't remember if an info box displayed that the Save was successful or not.
Once this change has been made and successfully saved, I unplugged the cameras ethernet cable from my homes router, and recycled the power to the camera.
This is the only item need changed on the camera.
Below is the procedure one needs do when adding add any item to a Mesh node:
* Before proceeding, allow the newly re-powered camera to perform it's POST... and both gimbal test moves.
* Connect the camera to your Mesh node via ethernet cable, prepare your PC to operate on the Mesh network, launch your browser and get into your Mesh node.
* Go into your Mesh nodes main opening screen, and then to the "Setup" page (your username "root" and password required)
* Click on the "Port Forwarding, DHCP, and Services" tab in the upper right region of the Setup screen.
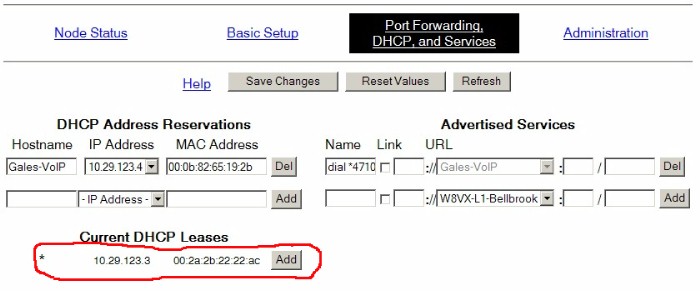
* on this screen, you should see in the bottom left that your Mesh node has assigned an IP address to your Camera (it won't be named at this point), and the IP and MAC address will be slightly different that what is shown below. This is in the Current DHCP Leases section of the screen:
* Click on ADD to the right of this, and the cam will appear in the DCHP Address Reservations... just above it. THIS IS WHERE you can give it a different HostName (note: hostnames in this field can not contain spaces between words).
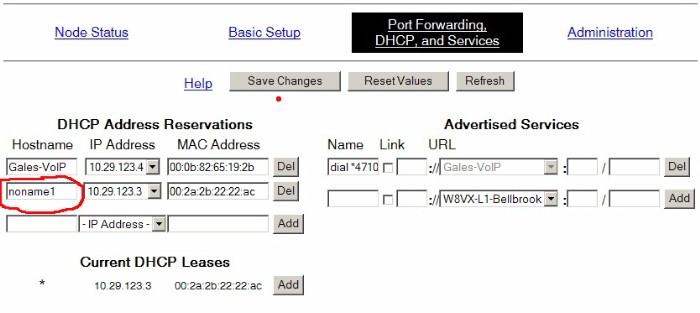
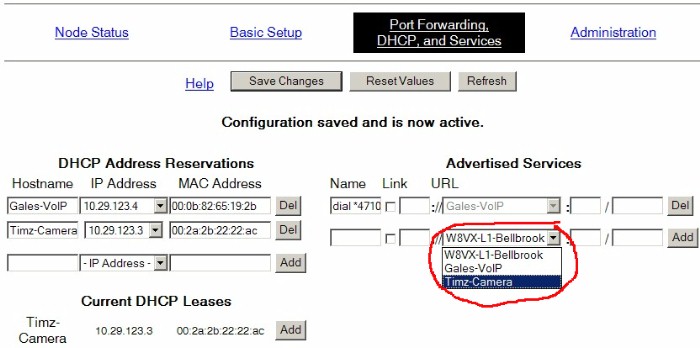
Type over the noname default and give the camera it's own unique name. Make certain the IP and MAC address matches your cameras specifics, then click on Save Changes gray box above. Note: the Save function takes a minute or two... be patient on this.
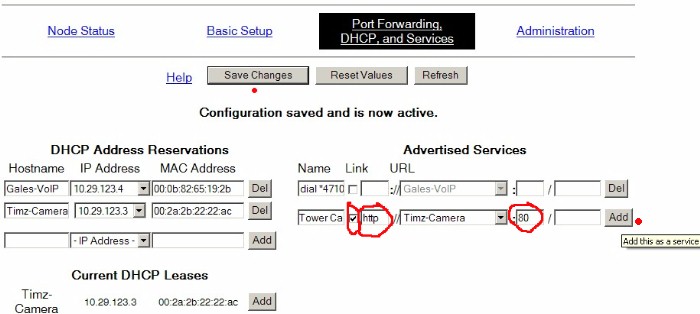
* if you want the camera to appear on your nodes Advertised Services list, go to the right part of the screen and with the bottom (mostly blank) line, click the down arrow and your camera should be one of the items listed, select it.
* in the Name field... this is the hyperlink text that will appear on your node for others to see; type in the hyperlink text name "Click for Camera"... or whatever you want it to appear as. It's always a good idea to keep this name field short & to the point.
* Also, click the "Link" checkbox, add "http" to the field to the right of the checkbox, and add "80" as the port to be used, then click on ADD.
* Don't forget to also click on Save Changes gray box near the top of the page again, after clicking on Add.
Note: the Save function takes a minute or two... be patient on this.* I don't remember that a node reboot was needed; I think I could go directly to the Mesh Status screen and
click on my camera services link.
return to main Mesh page