Timz MESH VOIP-ATA Setup Page Adding VOIP Telephone to your Mesh Node
using the WalMart BasicTalk ATA Interface
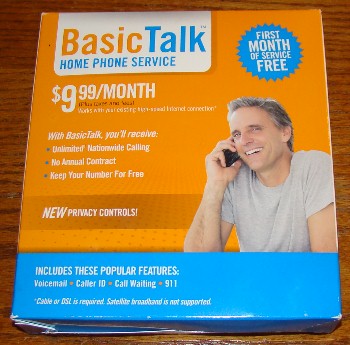
Purchase this from WalMart for $10
NOTE: WalMart is offering some BasicTalks for $5.99. These appear to be older (although new) units that are troublesome when used for Mesh. They will receive IP calls fine, but won't always originate calls; you also may not get a dialtone each time.
There now appears to be a solution for this; see bottom of this page for help with these particular units.
Here is what the box looks like:
DO NOT read the instructions that came with the ATA adapter
DO NOT connect this ATA adapter to the internet.
There are many different avenues of using this device on Mesh;
this particular one is called the "OoB" (Out of Box) ... or "No Flash" method
This method works without the need to reflash the ATA adapter; use it right out of the box as is.
At the start, have no cables plugged into the ATA adapter.
With your Mesh node up and running; connect using this specific order:.
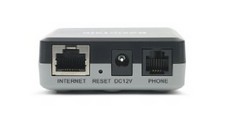
* Plug the BasicTalk VOIP ATA adapter into it's provided power cube, wait until at least one of the green lights is illuminated.
* Using the provided ethernet cable, plug the ATA adapter into your mesh node, wait at least 45 seconds.
* Go into your Mesh nodes main opening screen, and then to the "Setup" page (your username "root" and password required)
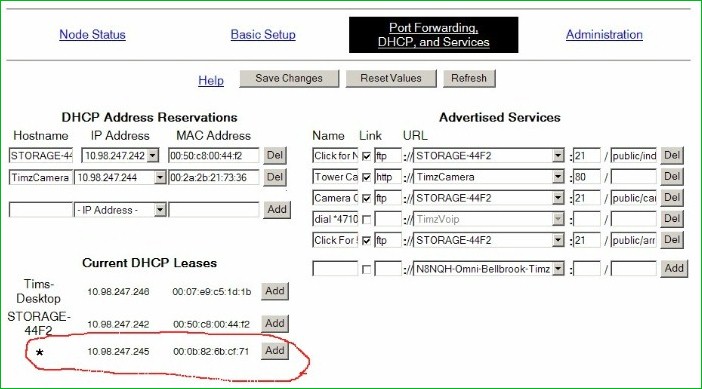
* Click on the "Port Forwarding, DHCP, and Services" tab in the upper right region of the Setup screen.
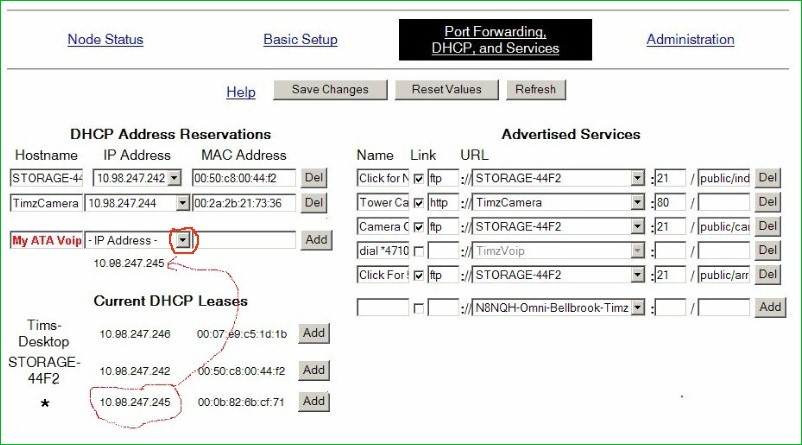
on this screen, you should see that your Mesh node has assigned an IP address to your VOIP ATA adapter:
your IP address will probably be something slightly different than the one shown. If your node is not showing the ATA adapter, click on
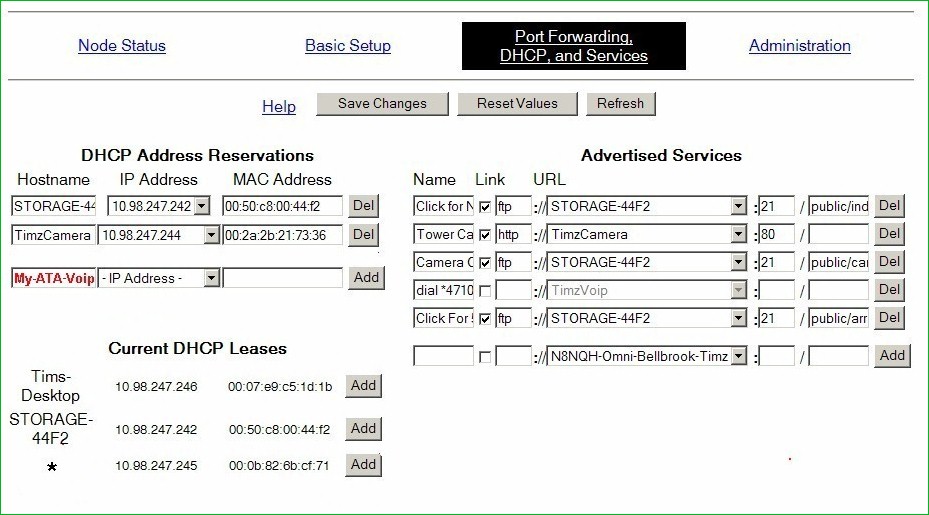
the gray "Refresh" box near the top of the screen.* Next, under the Hostname column, type in something... whatever you want. No spaces allowed!!!!
* Then, click on the IP Address box down arrow, and the IP address for your ATA adapter should be shown, click on it (note, there may be multiple items listed here). You do not type-in the IP Address, instead you select it from the drop-down box:
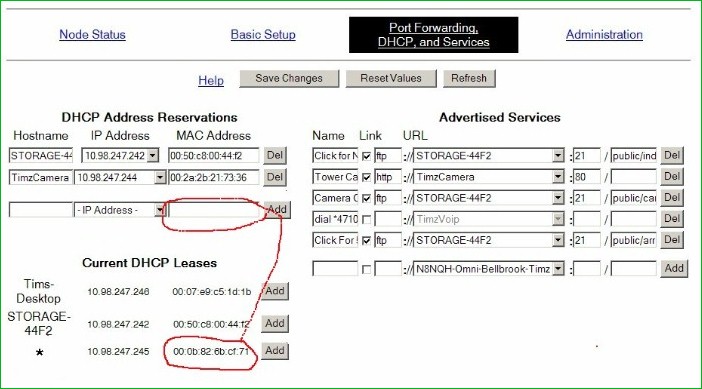
* Now, you must manually type in the MAC address of your ATA adapter. You must duplicate upper/lower case letters, and include the colons. Note: no letter O's are capitalized... all are lower case If it looks like a capital O, it's a zero instead. Your MAC address will be different than the one shown.
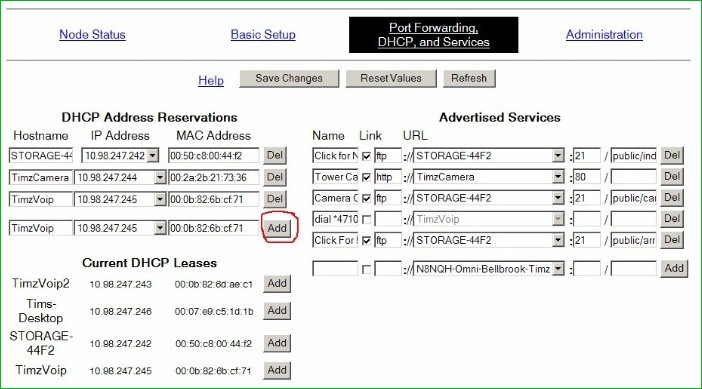
Then click "Add"
Almost done...
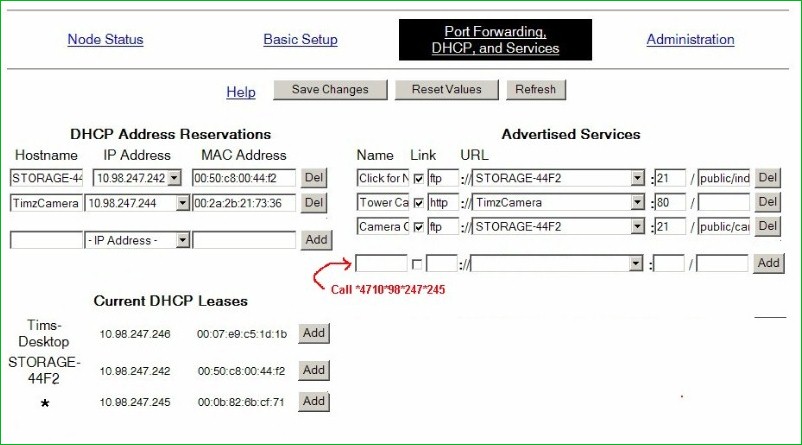
*over on the right half of the screen "Advertised Services", go to the bottom of one that is blank. Under "Name" type in "Call" space, and then your ATA adapters IP address, but add *47 to the beginning of it: yours will be slightly different than the one shown. Replace the "dots" (periods) in the IP address with " * " as shown; (star)4710(star)98(star)........
* In the "URL" box, click on the down arrow and find & select your ATA adapter:
Once the save process is complete (may take a minute or two) your VOIP is ready to use... no need to reboot your node.
Plug a telephone into the ATA adapter, and lift to hear a dial tone; call somebody !!! The key to success is hearing that dial-yone each & every time you take the phone off-hook. After first installation, you may have to power-down both the node and the BasicTalk... wait 30 seconds... then power it all back up again. It may take as long as 5 minutes for the BTalk interface to fully sync and then to give a dial tone after a reboot.
Tip: the Basic Talk ATA adapter doesn't tolerate much of a gap in the dialing sequence. With the IP address and extra characters... it is sometimes difficult to get it all punched-in without hesitating at some point within the dial-string.
NOTE: if your BasicTalk has a problem where it doesn't give a dial-tone every time... log into your BasicTalk (type it's IP address into your browser window while connected to Mesh) and note the
Software Version Program number of the device... it will look something like this:
click HERE for help.